The following screenshots were made in Photoshop but the tutorial works the exact same way with Gimp.
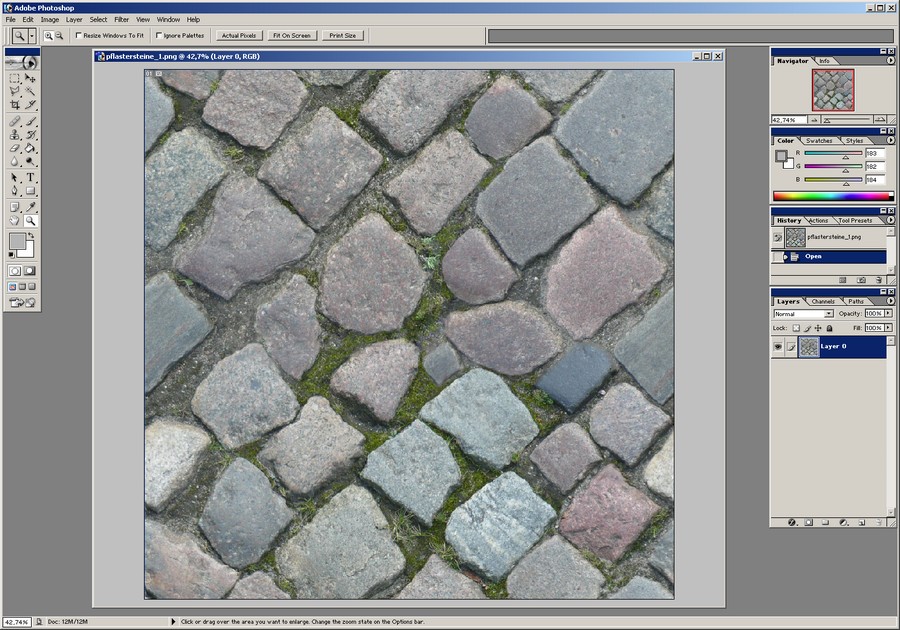
1. Open a texture
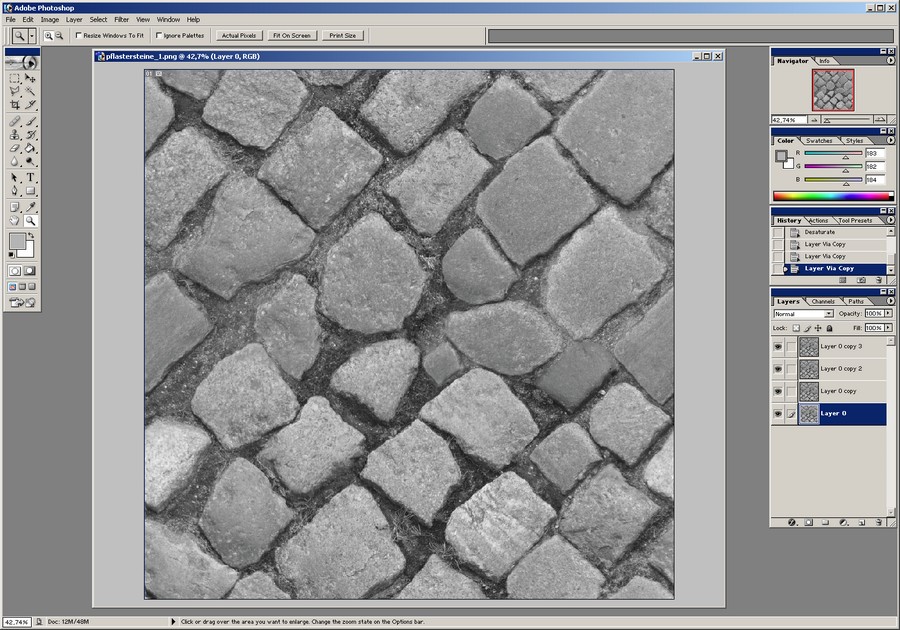
2. Desaturate the texture and duplicate the existing layer 2-4 times. Each of these layers will represent a detail level like lets say "very fine", "fine", "middle", "large" and "very large".
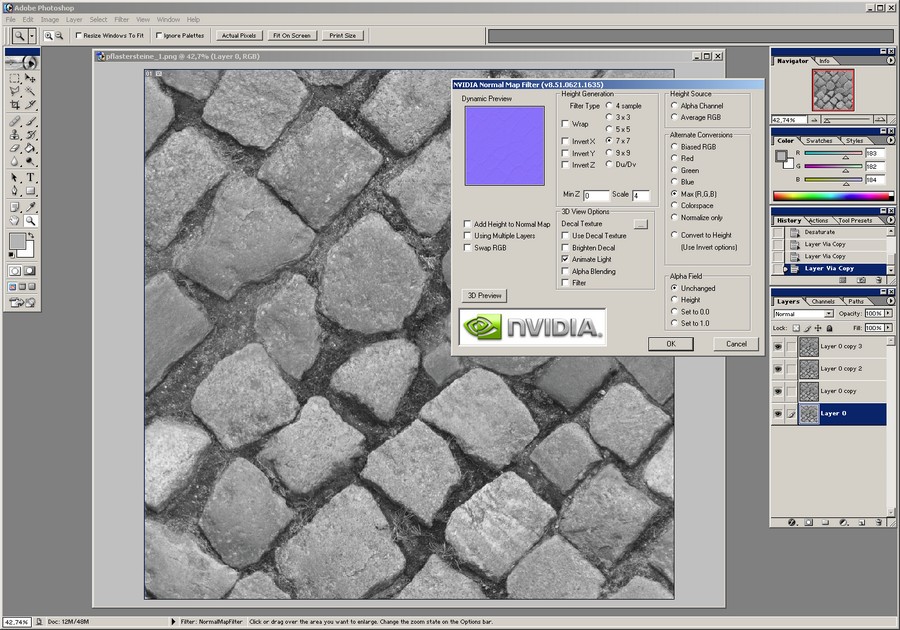
3. Apply a normal map filter with relatively low intensity/scale (in this example: 4) to the bottom layer. Set the opacity of the other layers to 0% to instantly see the result.
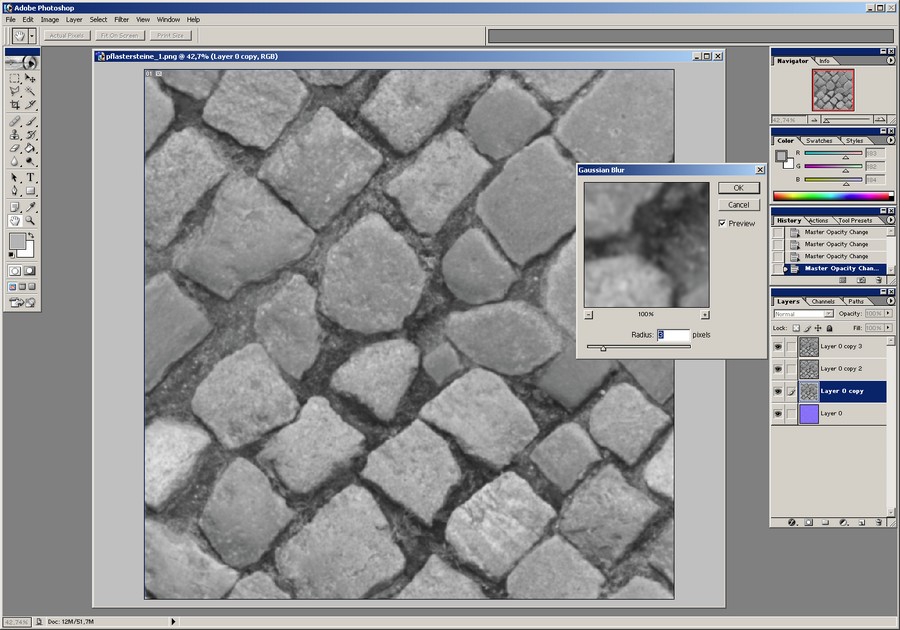
4. Switch to the next layer and apply a slight gaussian blur filter. I've set it to 3px for this example. Gimps gaussian blur seems to be less intensive so I would suggest to set it to a 2-3 times higher value. Afterwards add a normal map filter to the same layer with a higher scale value than used for the previous layer (8 in this example).
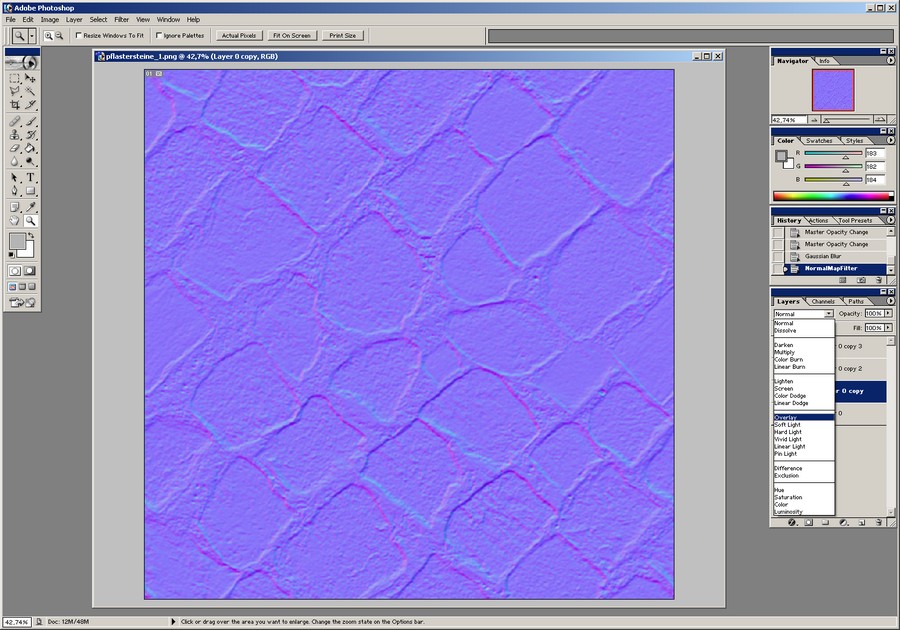
5. Change the layer blending to "overlay" and merge down the 2nd lowest to the lowest layer.
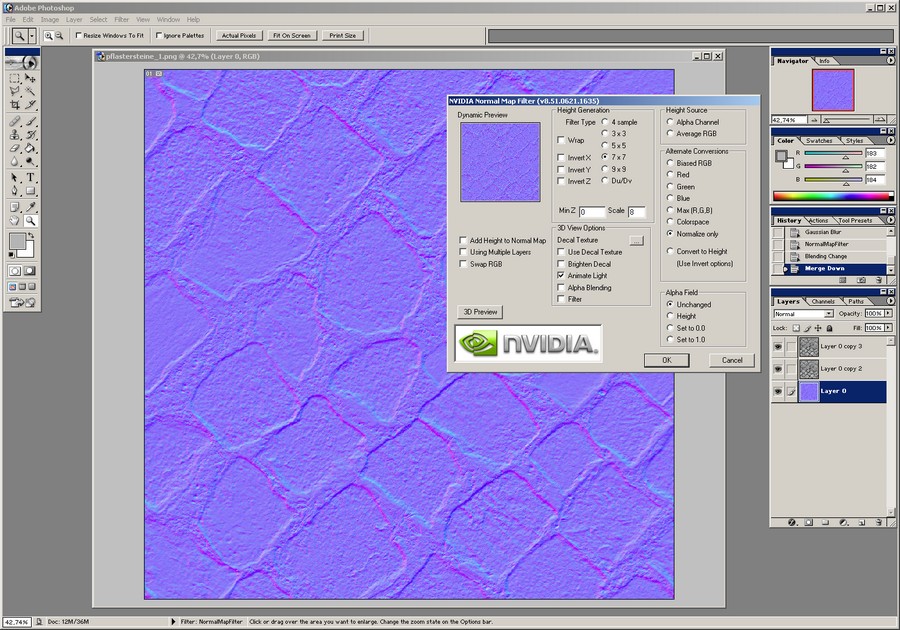
6. Open once more the normal map filter window but set the conversion mode to "normalize only" this time and apply.
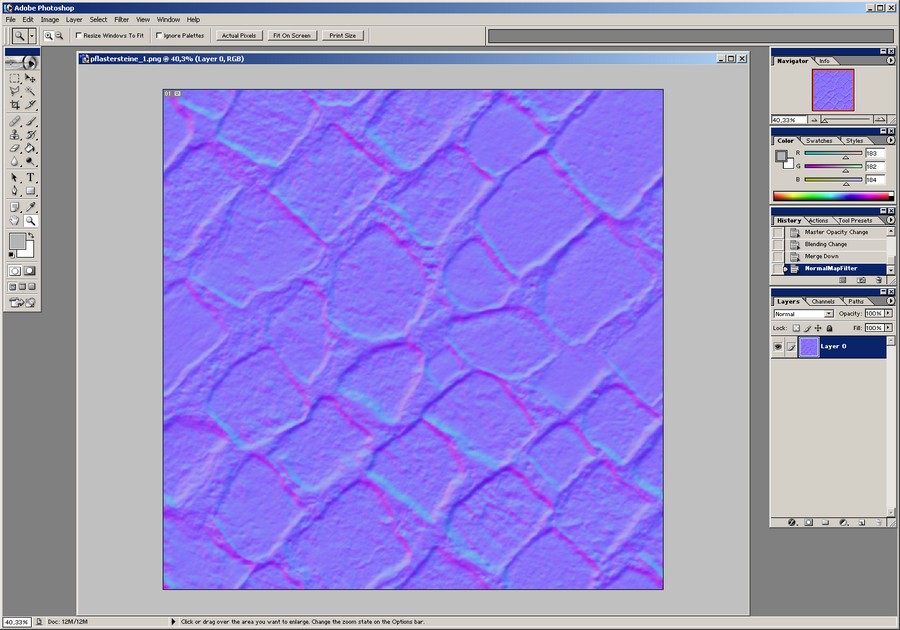
7. Repeat the steps 4 - 6 for all remaining layers. You will usually use higher values for the gaussian blur and normal map filter at each layer.
The final result of this example looks quite heavy due to the used values. layer 1: 12px - 32 layer 2: 6px - 16 layer 3: 3px - 8 layer 4: 0px - 4
The final results can be adjusted by using different values for both the normal map filter and the gaussian blur filter to give certain detail levels less or more intensitivity.
Besides the opacity of a layer can be decreased before merging it down. This will reduce the intensitivity of the corresponding detail level, too - just in a different way.
After lowering the normalmapfilter scale values as well as changing the lowest (2nd lowest) layers opacity to 0% (50%) the result changes as follows:
I have made basic normal textures with GIMP (based on my own textures made from scratch) and it worked well. I haven't really tried it with textures from photos. I like how you go into more depth than I normally would have thought of. Will read again and test out later.
I was never satisfied with just one usual normalmap filter. The intensitivity was always quite low but on the other hand the results became extremely flickering when using higher scale values. Sadly thats nearly almost the case if using photo resources. If you think about Crazybump or similar tools you have basically the same option by changing sliders for different detail levels.
-- Edited by mAlkAv!An on Friday 7th of October 2011 01:18:26 PM
" the results became extremely flickering when using higher scale values
sometimes Blurry"
- Check your R,G,B Channels separately; try to find where the highest amount of "Noise" &/or "Grain" is coming from. - Reduce this using 'Reduce Noise' Modifier inside photoshop.
- You can also use a material expression called "Component mask" [inside Unreal engines]- and choose the minimal value to remain -
- For this example lets pretend the Cement/ Mortar [or mertyle in german] is the value we want most pronounced and it is primarily in the Red channel
** e.g. Mask (G) + Mask (B) and multiply the Red by a "Constant 3" value & make the "Constant 3" value red [making Red as the primary/ Highest value] - Conversely you can reduce the noise again / blurry effect using the same process but by Masking the 'nosier' values = leaving (R) unchanged
-Another cool tip is to use the LERP/ Linear interpolate
- Combien with the above Mask procedure - lets force our high value cement between the bricks into A)- of the LERP
- place our bumps and detail and flat areas into the B) - of the LERP
- And then use the Alpha input to seperate the normals onto each part of the texture/ so the cement becomes liek cement and the paving stones become liek paving stones
* IF your mesh has a "Smooth" Modifier - remember this will drastically effect the Normal components.
*_______________________________________________*
- Im sure Malav!an is aware of this- but it may help others
- My personal advice is to avoid using Bump offset - this should be strictly resevred for other circumstances [saved for another topic]
-- Edited by TKBS on Friday 5th of April 2013 03:33:47 PM