Members Login
Username 
 
Password 
    Remember Me  
Post Info TOPIC: Blender Practice


...

Status: Offline
Posts: 4235
Date:
RE: Blender Practice
Permalink  


This house is awesome m8 !!!

__________________

Stevie's corner
A blog dedicated to UE4, UDK, UT99 / 2004 / III / 4.


Feedback-Master ..

Status: Offline
Posts: 1767
Date:
Permalink  
 

Achernar wrote:

@Odedge
1.Well I don't think it needs to be a big issue, the bottleneck is the rust texture with is only 1024 in length so I guess thats it. Traditionally I would aim for larger to keep it for later, in the event I ever want to use it again when screen resolution has doubled...

Not a big issue, but I like to be on the same page.  I created a 1024 for the diffuse.  While doing the rust, I started to clean up the original by cloning parts of it... then I remembered!  Not allowed. disbelief

2.I don't think it matters - just use wood. I know the picture does have a metallic finish but its hard to tell.

I used wood and tried to make a little rust border for the metail ring.

Ofc, touch up you maps however you see fit.

I have to say I am learning too much to error and trail for my liking. Too many new techniques at once. Oh well at least I learnt something.

I am kind of in the same boat.  I may have a bit too much info inside my head.  I tried 2 different ways for the HP mesh.  Baking my normal maps was "fun" as was the diffues texture as I haven't touched GIMP in a long time.

How completed are you?  I would say I am halfway done, if not a bit more.  I think it's better that we don't take too long trying to be "perfect" and show our results in a reasonable amount of time.  This we way can ask each other questions and maybe go back and see if we can improve on our first attempt.


In other blender news...

Random Question Time.

  1. When adding an edge loop, Blender defaults to putting itn at a percentage of the mesh.  Is there a way to move based on actual blender units (besides manually adjuting it in the transform properties)?
  2. When exporting a UV layout, is there any way to change the color of the UV "lines"?
  3. How do you allow blender to zoom through a mesh.  I saw it once in a video.

Building a layout in Blender vs the Editor

I am trying to find a good way to build a layout so I can the model pieces in Blender to fit (I will use some modual sizes).

1. Model intirely in Blender (first attempt worked well enough, see pic below).  In Blender, this is one mesh and I just added "sub-object meshes".  I assign the floor, the catwalk floors, and the rest of the catwalk their own material and color to give the mesh some depth.  This method would be good to get me to make Blender second nature.

Since Blender doesn't allow you to set an absolute scale size, I created a 1024 x 1024 plane mesh and duplicated it around (the floor in the mesh).

test_level.JPG

2. Create in Editor (I exported an entire BSP level (additive and subtractive brushes) and it didn't crash the editor!).  Subtractive brushes have to be kept to a minimum as the editor will export all brushes as if they are additive.  If the level is made entirely of additive, then it should work fine.

This is DM-DeReZ when I bring it into Blender (I am still surprised it didn't creash either program).  It's just a proof of concept that an decent size level can be exported then imported.

derez_in_blender.JPG


-- Edited by Odedge on Monday 14th of January 2013 03:06:10 AM

Attachments
__________________


Amateur UT mapper

Status: Offline
Posts: 736
Date:
Permalink  
 

@Malk
I'm liking the extra details, nice work.

@Odedge
1.Well I don't think it needs to be a big issue, the bottleneck is the rust texture with is only 1024 in length so I guess thats it. Traditionally I would aim for larger to keep it for later, in the event I ever want to use it again when screen resolution has doubled...

2.I don't think it matters - just use wood. I know the picture does have a metallic finish but its hard to tell.

Ofc, touch up you maps however you see fit.

I have to say I am learning too much to error and trail for my liking. Too many new techniques at once. Oh well at least I learnt something.


__________________


Amateur UT mapper

Status: Offline
Posts: 736
Date:
Permalink  
 

I still have a way to go. Made the LP and the HP but struggling to get a good UV layout for the HP. I had read initially that it wasn't necessary for backing normals. So haven't achieved the normal map or the diffuse yet.

answers:
1.The short answer is no.
2.Well I guess once you have the uv layout you can colourise the lines in Gimp.  I use it as a layer and fip back and forward in gimp so I know I'm texturing between the lines.  I also backen (mask out) the outer margins of the UV layout so its a smaller file and looks cleaner.
3.Well I guess its not always possible, sort of depends on the angle as you pan around the trackball. But I think you can use blenders camera Numpad 0 then Shift F and the middle mouse button to zoom in and out.

Wow I'm amazed you can export of DeReZ. I reckon if you start having trouble with sculpting a level from scratch you could always try retopologising the bsp with bsurface addon. Its very ambitious to build a layout in blender.  Need to be very organised to get all the texturing done nicely.


__________________


Amateur UT mapper

Status: Offline
Posts: 736
Date:
Permalink  
 

I am having trouble backing normal map. At the moment I'm taking a break from it.

About masking out its just a matter of taking the uv layout and applying contrast to mask out the islands. Then set the white space (uv islands) to alpha. Once the texturing is complete you can clean up the diffuse with the mask this will reduce the file size and save on texture ram.

Here is my limbo box with all the non textured area masked out.
boxlimbostylemask.jpg

I'm not sure I know what you mean about the camera zooming you have the option of changing the camera to turntable from a trackball.  You can pan with shift middle mouse button but you don't have complete feedom of motion. 

Well dm-glacier does looks like one of the better loyouts.  He did manage to get alot out of his texture atlas I have to say.  Good luck with it!


-- Edited by Achernar on Tuesday 15th of January 2013 11:11:44 AM

__________________


Feedback-Master ..

Status: Offline
Posts: 1767
Date:
Permalink  
 

Achernar wrote:

I still have a way to go. Made the LP and the HP but struggling to get a good UV layout for the HP. I had read initially that it wasn't necessary for backing normals. So haven't achieved the normal map or the diffuse yet.

You don't need to make a UV layout for the HP as you are only using it's normals to create a normal or ambient occlusion map onto the LP.  So only the LP needs a UV layout.

answers:
1.The short answer is no.
2.Well I guess once you have the uv layout you can colourise the lines in Gimp.  I use it as a layer and fip back and forward in gimp so I know I'm texturing between the lines.  I also backen (mask out) the outer margins of the UV layout so its a smaller file and looks cleaner.

I did finally colourise the UV layout in GIMP.  I guess this can be done in Blender as well (assign different materials to each section you would add color to in GIMP.  I am not understanding the "I also backen (mask out)" part, when you get time, maybe upload the image.


3.Well I guess its not always possible, sort of depends on the angle as you pan around the trackball. But I think you can use blenders camera Numpad 0 then Shift F and the middle mouse button to zoom in and out.

I "know" it's possible, just can't remember exactly where I saw it.  With a simple/small mesh, you can zoom to the interior of it easily, with a bigger mesh, it's "impossible" with out this setting?

Wow I'm amazed you can export of DeReZ. I reckon if you start having trouble with sculpting a level from scratch you could always try retopologising the bsp with bsurface addon. Its very ambitious to build a layout in blender.  Need to be very organised to get all the texturing done nicely.

I already have the bsurface addon activated, but try to keep using quads as much as possible. 

I have studied DM-Glacier a bit and he has most of the map built with "planes".  He would have a room's floors as one mesh, then the floor's trim would be another, then the walls would be another and so on.


 Comments in blue.


__________________


Feedback-Master ..

Status: Offline
Posts: 1767
Date:
Permalink  
 

Achernar wrote:

I am having trouble backing normal map. At the moment I'm taking a break from it.

I hear you.  If you are having trouble as it's not always a "black and white" process, let me know and maybe I can help.

About masking out its just a matter of taking the uv layout and applying contrast to mask out the islands. Then set the white space (uv islands) to alpha. Once the texturing is complete you can clean up the diffuse with the mask this will reduce the file size and save on texture ram.

Here is my limbo box with all the non textured area masked out.
boxlimbostylemask.jpg

I'm not sure I know what you mean about the camera zooming you have the option of changing the camera to turntable from a trackball.  You can pan with shift middle mouse button but you don't have complete feedom of motion. 

In the User Preferences, on the Input tab, there is "Zoom Style".  Continous should allow you to zoom in forever and go through everything (like in the editor), but for some reason it doesn't .  I tried Shift+F, but it's too slow and laggy for me.  I just need to be able to look inside a mesh from time to time. 

Well dm-glacier does looks like one of the better loyouts.  He did manage to get alot out of his texture atlas I have to say.  Good luck with it!


 Comments in blue.


__________________


Feedback-Master ..

Status: Offline
Posts: 1767
Date:
Permalink  
 

Achernar wrote:

Ok well after a bit of deliberation and a short sebactical here is my effort.

Looking very nice.  I would like to see your source files as your diffuse texture looks way better than mine.  I knnow we weren't suppose to "tweak" the textures using GIMP/PS, did you fudge this a bit?

Either way, it would be nice to see your source files (here is mine (Blend and GIMP file, individual images, as well as .ase files)

barrelinengine0.jpg  

I think the model looks really nice in game.  My biggest constructive comment would be that the barrel looks a bit too "bulgy".  If you scaled in the center areas a bit more, I think that would really help.

where you able to create a normal map?  I don't have Malk eyes when it comes to this stuff.

  barrelwire.jpg


 If you can, give me see insight into what you did to get the results you got.  Looking at your source files might help a lot as well.


-- Edited by Odedge on Saturday 19th of January 2013 07:44:09 PM

__________________


Amateur UT mapper

Status: Offline
Posts: 736
Date:
Permalink  
 

Top work on those barrels.  I figured you may have had plenty of polys left to spend on the low poly to add some more details but the final is quite good.  That sounds pretty tough to paint on the details you have without a good AO.

This was my workflow:

Well I had to take a step back at first and look at my poly budget of 500. So starting from here I looked where to spend them:

Given a conservative curvature of 5 loop cuts to describe the hull I ended up setteling on 18 unit circumference. So I could push it a bit further and add a recessed area at the top and bottom, so an extra 4 loop cuts to make this not bad.

So total of 18 x 9 = 162 for the outer hull.

Leaving me 338 left to spend, so

I figure I can afford some barrel rings too. Inspiration requires 6 rings

so 6 rings at a square geometery of 4 means 24 into 338 or 14.0833

A circumfrence of 14 is low but not too bad. Total count 498 Verts.  All the main features of the barrel in the low poly, I'm in business!

Then comes the high poly:

I modeled the planks with beveled edges using an array modifer combined with a curve modifier pin around a Bezier curve, this gave me control of a perfect circle.  Then I added a lattice with lattice modifier over it to create the buldge.  I did this for the hull and the rings seperatly. 

My first thought was to try and just grab the uv's from the unmodified (buldged hull) but this was a bit tricky and I lost a lot of time by removing doubles which screwed up the UV map a few times.  My next hurdel was trying in vain to use two uv layouts to paint on the texture.  I wanted to place the seperated plank uv's in the correct position on the texture then paint that onto the pristine layed out uv map I had painstakingly put together.  This proved to be a bridge too far. Then I set my sights to the normal map which took a while to figure out having constantly got "feedback loop detected" messages.  In the end I carefully aligned all the textures and rechecked the normal map backing settings and finally got my normal map.  Not the best but I wasn't about to start worring.  I'm on the home streath.  Next was the AO which was very easy.  Lastly I touched up the AO in gimp to remove some of the occulsion on the rings, so I can see the rust texture and bumped up the contrast as Blenders maps are always a bit grey.  Then tweak the diffuse to bring out the colour modulating saturation and contrast mainly then combined the diffuse and AO in one. That was it.  I still have a lot to learn getting good normal maps and the backing of AO isn't the best I've seen.  but it works!  So I'm a happy modeller...  for now.

My source files

Thanks for pushing me, without you I don't think I would have gone through the process for quite a while given all the bumps. 

Appologies for refering to this as Odedge's barrels.  ashamed  
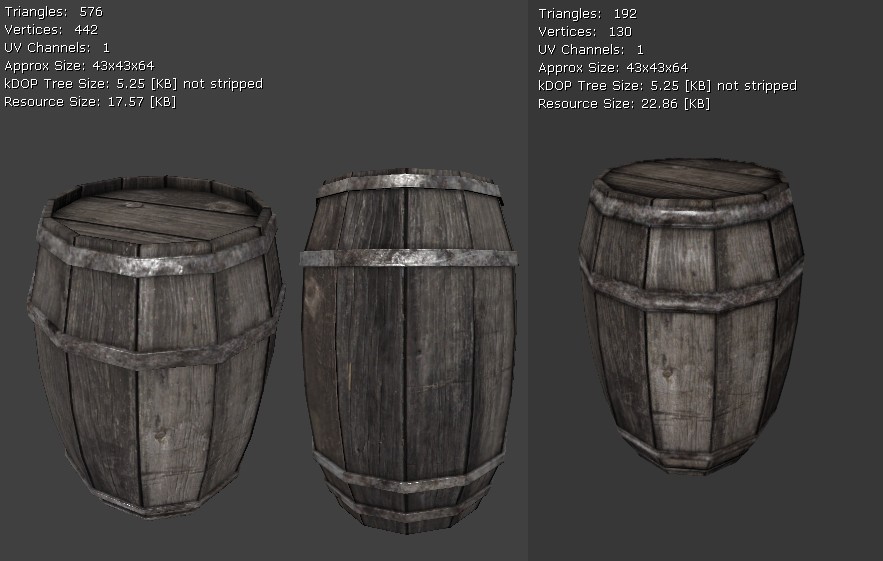
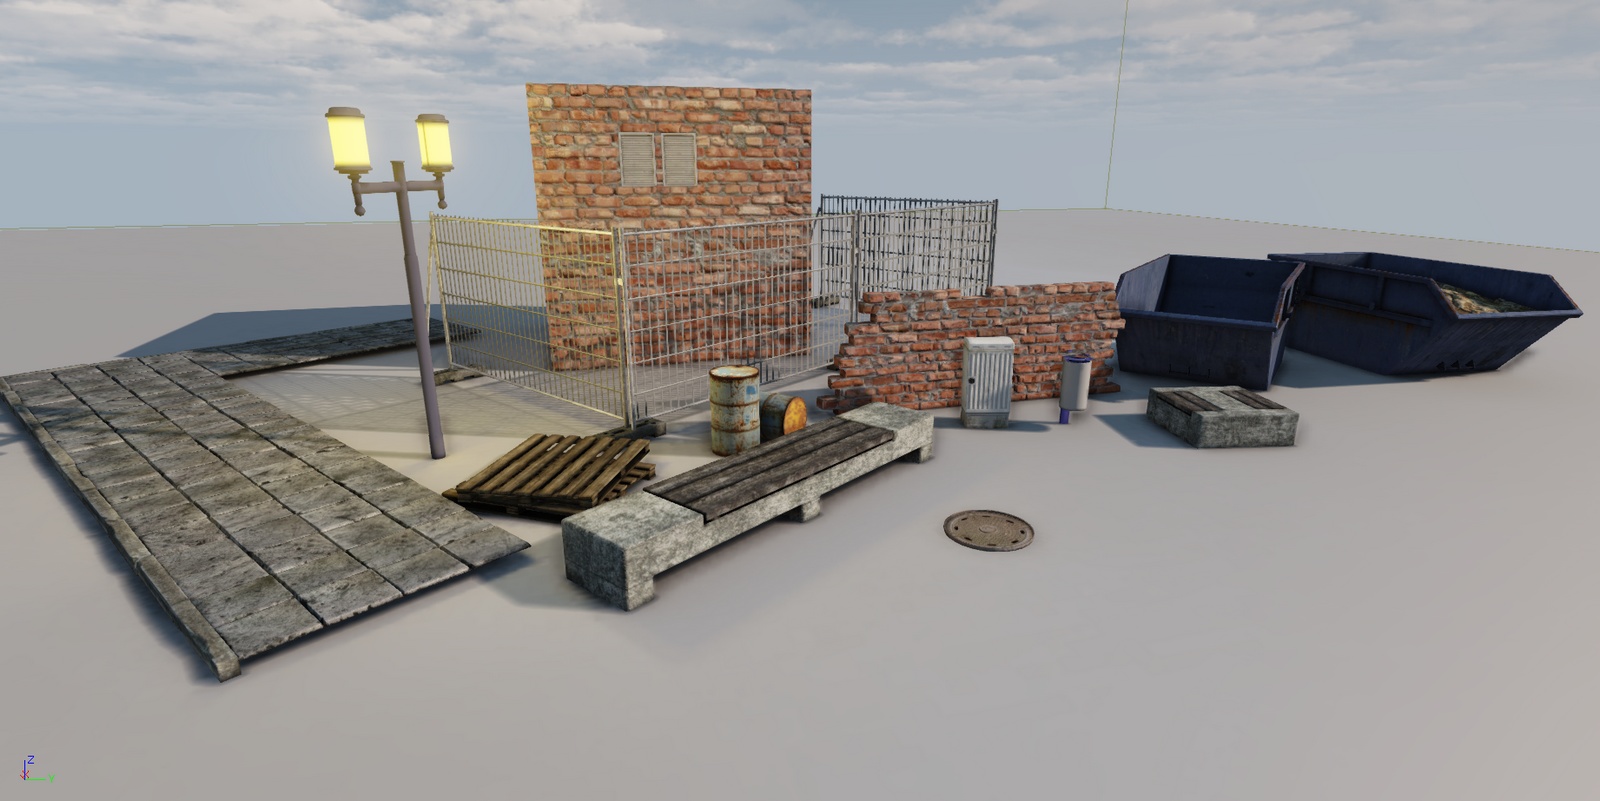
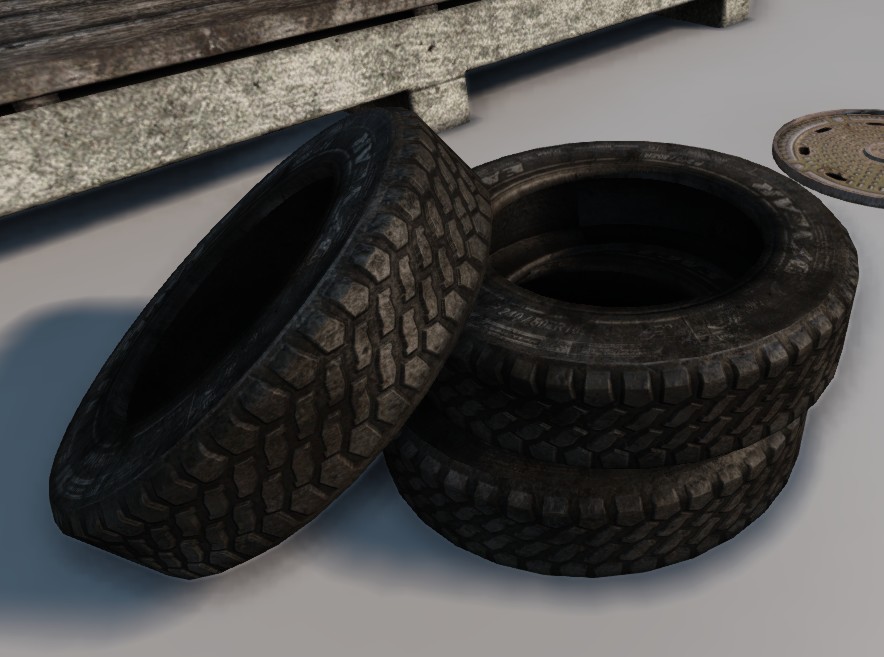
Its alot of fun when things work. wink  So whats next?


Edit: in response to your observation, please note that the camera adds 5 pounds.


-- Edited by Achernar on Sunday 20th of January 2013 05:03:58 AM

__________________


Amateur UT mapper

Status: Offline
Posts: 736
Date:
Permalink  
 

Ok well after a bit of deliberation and a short sebactical here is my effort.

barrelinengine0.jpg    barrelwire.jpg


__________________


Feedback-Master ..

Status: Offline
Posts: 1767
Date:
Permalink  
 

I was a bit surprised you posted today as I thought you would take a longer break from "Odedge's barrel" wink

I finished mine, but made some changes based on your model (though it doesn't make much difference).

barrel_01A.JPGbarrel_01B.JPG

 Originally, I went to conservative on the low poly and should have added a recessed top and bottom (which you did).  I reworked the model, but used the same diffuse and normal map.

barrel_02.JPG

I had an "good" result baking the normal map, but my ambient occlusion map sucked.  Maybe it's ths shape as there isn't alot of recessed areas?


Attachments
__________________


Amateur UT mapper

Status: Offline
Posts: 736
Date:
Permalink  
 

Odedge wrote:

Thanks for the nice words LPS and Blitz...


 +1 smile

Perhaps a little bit later down the track I'm not sure my assets are ready for prime time just yet.

@Odedge

Yeah I guess I cheated a bit, I couldn't help it I'm a compulsive tweaker.  Not to mention your model has to score highly for being much truer to the design specification.  I like the extra details you added, it gives it more depth.  I have to say my knowlege in Gimp would probably fit on a napkin, I usually just adjust saturation and colour balance mostly. 

My advice for creating a perfectly curved barrel would be to make one plank then apply the array.  It is possible to adjust the spacing between the planks by adjusting "relative offset".  Then add in a bizer circle.  In the modifiers chose curve and link up the bizer to it.  In edit it will just be a flat line of planks but in object mode it will conform to a circle.  You can adjust the size by selecting the bizer and scaling it, so the planks fit perfectly.

I'm all for another challenge, however this next week I will be quite busy so I'll hold off with such a distration. 

For the next project I'll side with the liberated gimping rule.wink


-- Edited by Achernar on Sunday 20th of January 2013 12:03:31 PM

__________________


Connoisseur of Bourbon!

Status: Offline
Posts: 2912
Date:
Permalink  
 

Barrels are looking good guys!

I'm interested in any custom assets that fit my Legacy Mod, especially UoF created stuff, so if you guys would like to see them put to good use let me know and I'll happily use ya barrels! smile (especially those fat ones as they look very 'Nali like' to me biggrin 
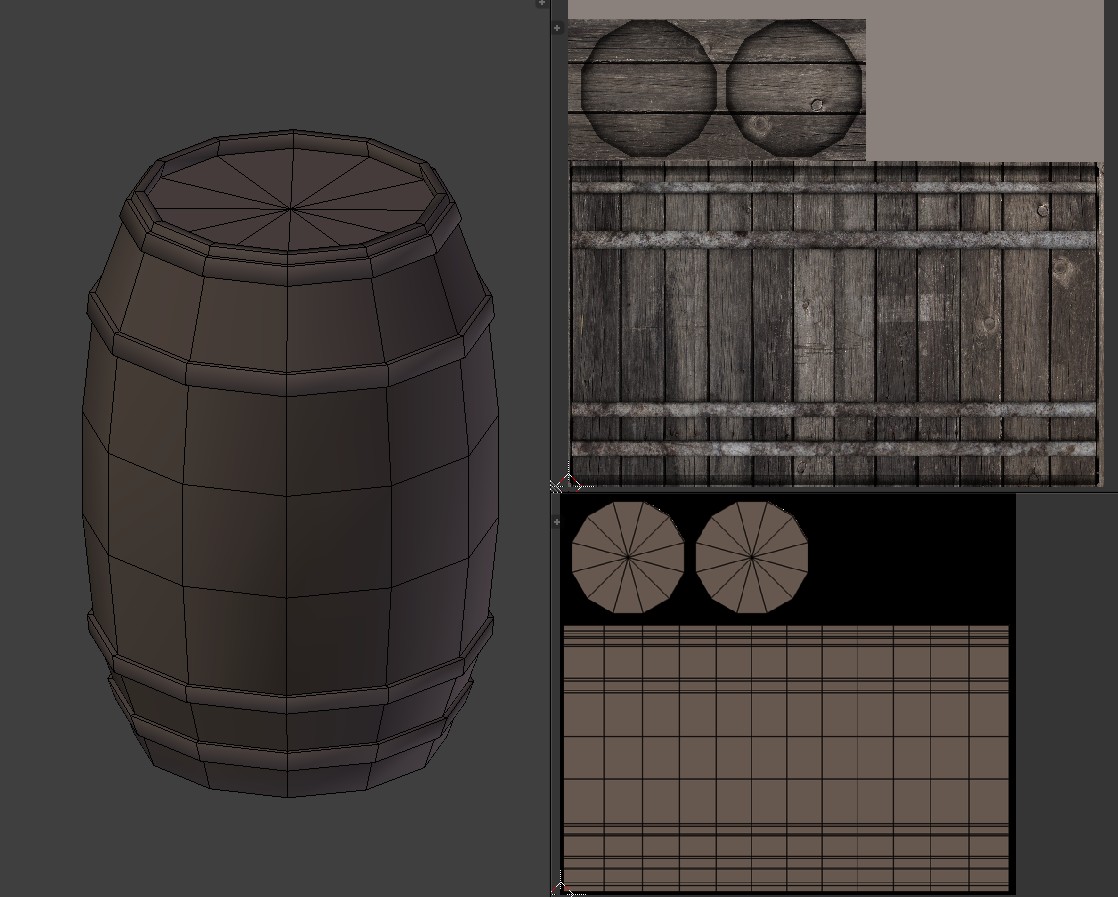
)  If you want to use them in your own maps first, no probs with that either!


__________________

I like playing with stuff!


...ǝp¡s ɹǝɥʇo ǝɥʇ uo

Status: Offline
Posts: 4290
Date:
Permalink  
 

Lord_PorkSword wrote:

Barrels are looking good guys!

...


 ...+1


__________________


AMD RYZEN 7 1800x@ 4.0ghz-MSI X370 PRO CARBON-MSI RTX2070SuperGamingX Trio-Corsair Vengeance DDR4 16GB-SAMSUNG 850Evo-LOGITECH G19-MSI DS300 & HX1200i-COOLERMASTER HAF Stacker915R/935/915F-Custom Loop


Feedback-Master ..

Status: Offline
Posts: 1767
Date:
Permalink  
 

Thanks for the nice words LPS and Blitz...

@ Achernar (I haven't looked at your source files yet)

I didn't do any tweaking to the diffuse in GIMP besides cut and pasting, which is why mine looks like it does. But then again, I don't know a lot of techniques to really make game textures.

I tried to do an array modifier out of a "wood plank that I sort of "curved", which was a pain to figure out. I wanted to have the normal map make some nice "grooves" between the planks, which didn't work out well.

So I just made a high poly (many faces) barrel and did some tweaking (added a subsurf modifier and set some faces to smooth, some to flat).

I agree that it's a very useful exercise and would like to do something else. I picked the first build off mesh, you can pick the second one (just keep it environmental related, either natural or man made).

I think we we should remove the "no GIMPing" rule so we can learn a bit more (which I need to learn GIMP more to make better looking textures).

I will check out your source files tomorrow and comment (if needed).


__________________


Feedback-Master ..

Status: Offline
Posts: 1767
Date:
Permalink  
 

@ Achernar

When your done with your busy week or so, just let me know as I want to push myself a lot more than I did with the first challenge. I may go back and try to make the diffuse better (I still need to look at your source files).

@ All

I am trying to be more effecient with UV mapping, so I looked at the "Stitching tools" a bit more and here are some thoughts.

  • Stitching refers to placing the vertices on the UV layout in the same location as they would be in 3d spaces.  When you select a vertex in 3D space, it's usually connected to other faces.  In the UV editor, it's doesn't automatically select them all.
  • I have found that stitching faces together properly will help not only with diffuse UV layouts, but also with Lightmap UVs as well as they will guarantee that the UV faces are in their proper place.

I am going to do a little demonstration that should speed up the UV layouts for more "hard surface" models.  I have the "shared vertex" in the "Sticky Selection Mode" drop down button selected for this entire process.

000.JPG

1. I am going to unwrap one side of a typical box with a recessed face.

001.JPG

2. Here is the UV layout after doing a Smart UV Project using the default values.  As you can see, everything looks proportional to each other, but where do all of the skinny rectangle pieces go?  Remember, they need to match the vertices and be "snapped" to each other as well.

002.JPG

3. I select the main face first.

003.JPG

4. Then I press the "V" key to enable the stitching mode, and press the "I" key to change the focus of which island would be snapped to.  Since each skinny rectangle pieces share vertices, they will be highlight in green.  It might be hard to tell, but around the main faces, there is a little purple edged highlight with a light yellow fill in color to show where the other faces will be moved to.  I press the mouse button to confirm this change.

004.JPG

5. This is what the change looks like.  The faces are positioned correctly!

005.JPG

6. I then position and resize the new island with the main faces and skinny rectangles so it's in a close position to the rest of the faces. 

006.jpg

7. Now it's time to do some quick "welding".  Since each face is in its proper location we now just select 1 vertex and each "shared" vertex will be selected, press the "W" key to bring up the Weld/Align menu, then select "Weld"

007.jpg

8. Repeat this for all of the remaining vertices and then enable "Island select mode", if you select any part of the visible faces and they are all selected, you know you have them perfectly stiched!

008.JPG

I think this can be helpful in any UV layout, but mostly in a light map UV.  This sort of arrangement is what I used in Tapinak and so far gives me the best results.


-- Edited by Odedge on Monday 21st of January 2013 06:21:40 AM

Attachments
__________________


Feedback-Master ..

Status: Offline
Posts: 1767
Date:
Permalink  
 

You have to love testing stuff out. I have found an even quicker way, instead of stitching each set of vertices in step 6, just scale the island with the "main face" so it fits with in the border faces. Select the "main face" island, press "V", then "I" so it stitches to the "border faces".

__________________


Feedback-Master ..

Status: Offline
Posts: 1767
Date:
Permalink  
 

@ Achernar

I reread your "workflow" post and took a look at your source files. Here are some random thoughts for the sake of improving for the both of us.

  • I like how you used the lattice as it should give you more control buldging the mesh over my method which was selecting faces and sacling them.
  • For your LP, I think you could have added some loop cuts for the metail reings and extrude them along the normals a bit away from your mesh.  This would have given you less faces and no overlapping faces.
  • For your HP, you did exactly what I wanted to do, but I couldn't pull it off.  I wanted to have that "beveled faces" between each plank for the normal map.  Maybe adding a subsurf modifier to the planks, but mainly for the rings might have helped?
  • I can't tell you why, but your normal map has some funky artifacts.  Though it does look like it has more info than mine.
  • I like your AO map much better as well. I think we interpreted the source image a little differently as I tried to make my rings flush with the wood.  But I think that limited to what my normal map and AO map would be like (which is why my AO map isn't showing any shadows!).  I think extruding the rings like you did was the smart way to go for a game model.
  • Did you "multiply" the dffuse map and the AO map in GIMP (also, do you have the 2.8 version)?
  • For your diffuse, it's interesting how you placed your metal rings in their own places and made them bigger.  I thought of mine too literal and didn't give them enough space as they look too "low res".
  • I know you probably mentioned before, but  why did you create the "Mask" texture again?  Is this the simplier way of looking at your UV layout in GIMP?

Now that I have looked at your source files and saw a different work flow, I call this exercise a complete success as it's taught me a few things and make me look at different ways of working. biggrin


__________________


calculating Pi by hand

Status: Offline
Posts: 768
Date:
Permalink  
 

I like the stitching tools and I know you just want to show the workflow. But for this specific example it's faster to do a projection from view and than just scale dow the inner face.

UV_001.png


(Using a regular unwrap (conformal, no seams) is even faster but the edges are not perfectly ligned up with x/y axis, which is important for lightmaps.)


Attachments
__________________

Blog

Nichts wäret ewiglich, nur die Natur bleibt bestehen.


Feedback-Master ..

Status: Offline
Posts: 1767
Date:
Permalink  
 

mAlkAv!An wrote:

I like the stitching tools and I know you just want to show the workflow. But for this specific example it's faster to do a projection from view and than just scale dow the inner face.

UV_001.png

 (Using a regular unwrap (conformal, no seams) is even faster but the edges are not perfectly ligned up with x/y axis, which is important for lightmaps.)


 Curse you and the knowledge you have that I don't! (yes, still a compliment).

I always thought that when you did that, the "inner" faces that are perpindicular to the main faces, where actually edges stacked on top of each other.  I just tried your method and it worked great.  So thanks for lettting me know.

EDIT: I have started on a new version of the barrel, using some stuff I learned. I have what I think is a pretty cool looking HP mesh, but I am having a hard time getting what I think should be a good normal map.  Is there any tips or tutorials/videos you have seen to shed some light on this process.

One thing that perplexes me is how I can't bake the spaces between each plank onto the LP model no matter what I try. hmm

001.JPG


@ Achernar

I am glad that you have my back in case we have have to fight inside of Blender one day wink.


-- Edited by Odedge on Tuesday 22nd of January 2013 06:48:55 AM

Attachments
__________________


Amateur UT mapper

Status: Offline
Posts: 736
Date:
Permalink  
 

@Malk
To be fair it was just a demo of stitching.

@Odedge

For your LP, I think you could have added some loop cuts for the metail reings and extrude them along the normals a bit away from your mesh. This would have given you less faces and no overlapping faces.

Yeah this isn't a bad suggestion, thanks.
For your HP, you did exactly what I wanted to do, but I couldn't pull it off. I wanted to have that "beveled faces" between each plank for the normal map. Maybe adding a subsurf modifier to the planks, but mainly for the rings might have helped?

Maybe but even just using a stright edge plank is ok if you give it some distance between the each other with the array modifier.

I can't tell you why, but your normal map has some funky artifacts. Though it does look like it has more info than mine.

Im not to sure but I'm guessing it has to do with them not quite over laping very well.
I like your AO map much better as well. I think we interpreted the source image a little differently as I tried to make my rings flush with the wood. But I think that limited to what my normal map and AO map would be like (which is why my AO map isn't showing any shadows!). I think extruding the rings like you did was the smart way to go for a game model.

Thanks, I figured I had to add the extra details to conform to fully detailed barrel.  It seemed less of a challenge otherwise.wink
Did you "multiply" the dffuse map and the AO map in GIMP (also, do you have the 2.8 version)?

Yeah that it,  but I had to lower the opacity of the AO a fraction too.  I'm not using 2.8 I'm using 2.8.2 wink  I like the way you used layers of the planks cutting them out each individually.  I typically use a mask and pint in the extra details by hand, but your way is cleaner.
For your diffuse, it's interesting how you placed your metal rings in their own places and made them bigger. I thought of mine too literal and didn't give them enough space as they look too "low res".

Your barrel is much more true to what the original design which came out much cleaner than mine. 
I know you probably mentioned before, but why did you create the "Mask" texture again? Is this the simplier way of looking at your UV layout in GIMP?

I might have a few textures painted outside the UV layout so buy overlaying at the end with a back texture this cleans away any stray pixels and reduces file size to boot.

-------------------

respone in green


__________________


calculating Pi by hand

Status: Offline
Posts: 768
Date:
Permalink  
 

Achernar wrote:

@Malk
To be fair it was just a demo of stitching.


Of course it is, I didn't mean to depreciate the post


Odedge wrote:
EDIT: I have started on a new version of the barrel, using some stuff I learned. I have what I think is a pretty cool looking HP mesh, but I am having a hard time getting what I think should be a good normal map.  Is there any tips or tutorials/videos you have seen to shed some light on this process.

One thing that perplexes me is how I can't bake the spaces between each plank onto the LP model no matter what I try. hmm


Can you post a screen with an LP overlay? Make sure to have smooth shading for the LP model, baking across hard edges is usually causing issues.


__________________

Blog

Nichts wäret ewiglich, nur die Natur bleibt bestehen.


Amateur UT mapper

Status: Offline
Posts: 736
Date:
Permalink  
 

My only suggestions for the extra relief on the normal is to try and widen the gap between the planks and or reduce the subdivisions or smoothing on the planks, perhaps add a bevel instead to the edges parallel to each other.

__________________


Feedback-Master ..

Status: Offline
Posts: 1767
Date:
Permalink  
 

mAlkAv!An wrote:
Can you post a screen with an LP overlay? Make sure to have smooth shading for the LP model, baking across hard edges is usually causing issues.

 I don't think there is need to now... I watched a 3ds max tutorial and they use a "cage" to determine what parts of the HP mesh will be baked, I guess this is similar to the "Distance" and "Bias" setting, I just like the visual aspect of the cage.  I also tried to make the LP cover up the HP.  Before, I think I was trying to put the LP in the "middl"e of the HP.

So I reworked the LP to surround the HP completely, which gave good results.  I also remembered to smooth out the LP (which isn't really intuitive), but that helped a lot on the metal rings sections as they were very angular on the baked normal (even though they are very smooth on the HP because of setting them to be smooth and adding a subsurf modifier).  I did make the top and bottoms shaded flat though as there shouldn't be any normal information from the HP (plus the bake gave me a weird color, almost like it was raised/lowered a bit in the center).

I also forgot to keep the UVs in unique places, so I was duplicating normal information. disbelief  Question: If you have a mesh that would greatly benefit from overlapping the UVs for the diffuse map, but ambient occlusion and normal maps require unique UV locations (as well as a Lightmap UVs), you could just create one UV layout for these types of map.  You said that you can tell the editor to use a different UV layout in the material editor?

001.JPG  002.JPG

You can see the LP on the left displayed in Texture mode and it basically covers the entire HP mesh.  The pic on the right shows the LP in wire frame mode.

bake_normals_4096-Best1.jpg

 Here is a picture of one of my best bakes.  I am happy with most of it.  The parts I don't like are the very top parts of the barrel.  Now that I think of it, I I could just "paint" over them with the standard "flat" normal color and they would appear flat, which is what I want.

bake_normals_4096-Best2.jpg

This is basically the same, but I made all of the rings shaded smooth.  It's a more gradual normal, which is good, but I don't know how well it will translate.  I still think the first picture is better.

bake_normals_4096-Best3.jpg

This is my first pic, slightly modified.  I touched up some funky pixels along some of the metal bands and filled in the standard default color to cover the black (which I presume you should always do?).


@ Achernar

All good suggestions, but when I was trying to remake the plank, I discovered that part had the render icon in the out liner turned off.  As soon as I changed it... Boom! planks.  I had to tweak them a bit to fill in some gaps, but that was easy.

I also realized that since the tops and bottom both have recessed areas, no need to try and bake that info, so I made the "walls" perpendicular instead of the flaring them out a bit.  I read that if you are going to have sections that are at a 90 degree angle and have some depth to them, to move the "walls' out a bit so that info can be baked.

Thanks to the both of you for your help.  I am very pleased with the progress I made in the last two days as they actually look like normal maps.  I don't know how much better I can get them for this model though. hmm


Attachments
__________________


calculating Pi by hand

Status: Offline
Posts: 768
Date:
Permalink  
 

Odedge wrote:
Question: If you have a mesh that would greatly benefit from overlapping the UVs for the diffuse map, but ambient occlusion and normal maps require unique UV locations (as well as a Lightmap UVs), you could just create one UV layout for these types of map.  You said that you can tell the editor to use a different UV layout in the material editor?

Yes, in the texcoord node properties you can specify which UV channel to use. It's 0 by default.


This is my first pic, slightly modified.  I touched up some funky pixels along some of the metal bands and filled in the standard default color to cover the black (which I presume you should always do?).

I always do so too but technically it's not required as long as the baked pixel margin is large enough. Otherwise you will see obvious seams at a distance when texture mip maps will fade in.

What you can also do is to create a new image with the proper background color in the UV Image editor and uncheck "clear" for the bake options. For ao maps that would be pure white (1;1;1) and for normals (0215;0.215;1)


__________________

Blog

Nichts wäret ewiglich, nur die Natur bleibt bestehen.


calculating Pi by hand

Status: Offline
Posts: 768
Date:
Permalink  
 

Here's my quick approach on a barrel for my UDK project:

objects_barrel01_udk_ogiia.jpg


objects_barrel01_blenarpzn.jpg


-- Edited by mAlkAv!An on Friday 25th of January 2013 12:28:55 AM

__________________

Blog

Nichts wäret ewiglich, nur die Natur bleibt bestehen.


Checkmate mate.

Status: Offline
Posts: 1022
Date:
Permalink  
 

Very nice. Also nice how the specular of the metal trim reacts (Reflective)

__________________


My Leveldesign Portfolio
Map Packs for Unreal Tournament 3

Internal Coördination of the UOF4 Low Poly Map Pack


Feedback-Master ..

Status: Offline
Posts: 1767
Date:
Permalink  
 

@ Malk

Good tip on creating a base texture for baking your normals and ambient occlusion (which I still need to do for this project).

Very nice looking barrel... that diffuse texture looks very nice! Did you create a normal or ambient occlusion map for it as well? Also, that second pic, I presume the bottom right is the "UV layout"?

I was going to continue working on my barrel, so nice timing giving me a little extra motivation. wink


__________________


calculating Pi by hand

Status: Offline
Posts: 768
Date:
Permalink  
 

I made a very quick high poly model for proper shading. But most information is coming from a simple diffuse->normal conversion. Therefore I did align the source textures planks and rills with the LP model edges, respectively the high poly ao map.

Here's the texture set and PS layers setup for the diffuse:

objects_barrel01_textcacvp.jpg


objects_barrel01_diffkkfaq.jpg


Odedge wrote:


 Also, that second pic, I presume the bottom right is the "UV layout"?


 Yes, I just made this extra picture to show the uv layout, which is always nice to see as you said some time ago wink


__________________

Blog

Nichts wäret ewiglich, nur die Natur bleibt bestehen.


Amateur UT mapper

Status: Offline
Posts: 736
Date:
Permalink  
 

@Malk
Great work on that barrel it's come out quite well, normal complements quite well.

@Odedge
Thanks for demoing those normal map some good info. I agree the top one looks the best.

__________________


Feedback-Master ..

Status: Offline
Posts: 1767
Date:
Permalink  
 

I did a little more work on my AO and created a normal map. I need to install all of my plug-ins from GIMP 2.6 to 2.8 and such. I installed the Normal Map Plug in and here is what I have for today...

bake_AO_4096.jpg

Here is my best AO map to date.  I was having major issues with the planks not baking to the top and bottom.  I rechecked all of my meshes and found one of the rings did not have a scale of 1.0.  Once I fixed this and rebaked, the planks worked!?!?

I still can't for the life of me figure out what is causing the black stripes on the outer planks (relative to the image). hmm

diffuse_01.jpg

Here is my current attempt at a diffuse (I will try again after I get some suggestions and such).  I did some saturation changes and levels and stuff like that.  I also tried to make the rings have a visible border which I did by duplicating the layer, cutting out the center section, then mixing the new layer by using the "Burn" mode.  I alos added a little shadow under the rings.  It's all these litle things that add up to make a difference in creating textures.

specular_01.jpg

Here is my first attempt at a specular map.  Noting on it should really be that shinny!  I just duplicated the Diffuse layer group (Yay GIMP for having them now), converted each layer to a grey scale and tweaked the "Levels", which I am still learning.

normal_01.jpg

I created a normal map out of my diffuse (after I converted it to a grey scale image and tweaked it).  I then tried to merge the normal map from Blender and GIMP and after a search, used the Grain mode.  Which seems to work good?

Granted, I have no clue how this will look in the game, I will find out this weekend.

Random Question Time!

1. If a mesh has a scale value of something besides 1.0, can it drastically effect baking textures?

2. Any way to get GIMP to always export a 24bit BMP file?

3. What's the best blending mode to combine 2 normal maps?

4. In UDK, when creating a Lightmap UV, you don't need to place any padding between your UV islands and the edge of the postive UV spaces.  Does this apply to the UT 3 editor?


-- Edited by Odedge on Saturday 26th of January 2013 07:48:22 AM

Attachments
__________________


calculating Pi by hand

Status: Offline
Posts: 768
Date:
Permalink  
 

Odedge wrote:
1. If a mesh has a scale value of something besides 1.0, can it drastically effect baking textures?

2. Any way to get GIMP to always export a 24bit BMP file?

3. What's the best blending mode to combine 2 normal maps?

4. In UDK, when creating a Lightmap UV, you don't need to place any padding between your UV islands and the edge of the postive UV spaces.  Does this apply to the UT 3 editor?


1. No idea but you can just apply the scale (CTRL+A, object mode) so it shouldn't matter?

3. This is a difficult question. Overlay is quick and most common. I use overlay but set the blue channel level range from 0-255 to 0-128 for all additional layers except the base one. This helps to not blech out the blue channel and lose depth. As a final step you need to normalize your map.
For further information have a read here: http://wiki.polycount.com/NormalMap/#Blending_Normal_Maps_Together

4. Not sure but even for UDK I always keep some space to the bounds, something like 1 texel of a 64²px map works well most times.


Odedge wrote:
Thanks for posting the screenshot with your PS setup. Would you mind uploading that so I can take a look at it more closely.. biggrin

http://www.mediafire.com/?419c84as6z55952


-- Edited by mAlkAv!An on Saturday 26th of January 2013 10:29:22 AM

__________________

Blog

Nichts wäret ewiglich, nur die Natur bleibt bestehen.


Feedback-Master ..

Status: Offline
Posts: 1767
Date:
Permalink  
 

mAlkAv!An wrote:

I made a very quick high poly model for proper shading. But most information is coming from a simple diffuse->normal conversion. Therefore I did align the source textures planks and rills with the LP model edges, respectively the high poly ao map.

Here's the texture set and PS layers setup for the diffuse:

objects_barrel01_textcacvp.jpg


objects_barrel01_diffkkfaq.jpg


 Top Left=Specular Map

Top Right=Ambient Occlusion (looks great btw and I still need to figure this one out)

Bottom Left=Normal Map (combination of Blender and PS).

Bottom Right=Emissive Map hmm

Thanks for posting the screenshot with your PS setup.  Would you mind uploading that so I can take a look at it more closely.. biggrin

@ All

I did get a slightly better diffuse texture on my second try at the barrel, but if I suck at using Blender, I suck even more at GIMP (for making game textures).  That said, can Malk/Achernar or anyone else with these skills give me some general techniques to learn (for example: Adjusting the saturation (you don't have to tell me how to do it)).  I have all of these random thoughts in my head, but now I need to organize them and apply them.


__________________


...ǝp¡s ɹǝɥʇo ǝɥʇ uo

Status: Offline
Posts: 4290
Date:
Permalink  
 

malk you re a SM factory!!...and all is nice

__________________


AMD RYZEN 7 1800x@ 4.0ghz-MSI X370 PRO CARBON-MSI RTX2070SuperGamingX Trio-Corsair Vengeance DDR4 16GB-SAMSUNG 850Evo-LOGITECH G19-MSI DS300 & HX1200i-COOLERMASTER HAF Stacker915R/935/915F-Custom Loop


Feedback-Master ..

Status: Offline
Posts: 1767
Date:
Permalink  
 

Malk, thanks for the PS file.

I manually fixed my AO map and had some issue with the very top part of the barrel, but here is my second effort.

000.JPG

The left one is my first attempt, the right one is my second attempt.

"What is it doing?

It's learning!"


Attachments
__________________


calculating Pi by hand

Status: Offline
Posts: 768
Date:
Permalink  
 

Working on a set of 'urban props'. Still lots of things to do - when it's done I'll provide a package for free download.

All models are ready for UE3, including custom collision meshes, LoD models and lightmap UVs.


urbanprops001objlq.jpg


__________________

Blog

Nichts wäret ewiglich, nur die Natur bleibt bestehen.


...ǝp¡s ɹǝɥʇo ǝɥʇ uo

Status: Offline
Posts: 4290
Date:
Permalink  
 

wow....that s a complete "kit""!...so many nice things here, good job bro....the tiling on the left is a pure asskick!

__________________


AMD RYZEN 7 1800x@ 4.0ghz-MSI X370 PRO CARBON-MSI RTX2070SuperGamingX Trio-Corsair Vengeance DDR4 16GB-SAMSUNG 850Evo-LOGITECH G19-MSI DS300 & HX1200i-COOLERMASTER HAF Stacker915R/935/915F-Custom Loop


Checkmate mate.

Status: Offline
Posts: 1022
Date:
Permalink  
 

Love your new assets! Very impressive job on all of them. Very realistic looking.

__________________


My Leveldesign Portfolio
Map Packs for Unreal Tournament 3

Internal Coördination of the UOF4 Low Poly Map Pack


...

Status: Offline
Posts: 4235
Date:
Permalink  
 

mAlkAv!An wrote:

Working on a set of 'urban props'. Still lots of things to do - when it's done I'll provide a package for free download.

All models are ready for UE3, including custom collision meshes, LoD models and lightmap UVs.


urbanprops001objlq.jpg


 Another awesome set of meshes biggrin


__________________

Stevie's corner
A blog dedicated to UE4, UDK, UT99 / 2004 / III / 4.


Connoisseur of Bourbon!

Status: Offline
Posts: 2912
Date:
Permalink  
 

+1 to the above comments!
Really really liking the brick work M8!!

__________________

I like playing with stuff!


calculating Pi by hand

Status: Offline
Posts: 768
Date:
Permalink  
 

Thx mates, let me know if you got some ideas for additional objects. For now I plan to make one more lamp/lantern, another piece of brickwall, trash bags, air conitioner, 2-3 modular road pieces, perhaps 1-2 doors.

Yesterday I finished a tire and just checked out scetchfab.com which has some nice blender support: https://sketchfab.com/show/wco8jUOX0gBWBBIoS2WzgsYvaMj
(looks better in UDK though, http://www.abload.de/img/urbanprops0029dlx2.jpg)


-- Edited by mAlkAv!An on Thursday 14th of March 2013 07:39:50 AM

__________________

Blog

Nichts wäret ewiglich, nur die Natur bleibt bestehen.


calculating Pi by hand

Status: Offline
Posts: 768
Date:
Permalink  
 

Digging into blender renders. I've been always impressed by photorealistic renders that some peaople pull off so I had to give it a try by myself.

The pic is still somewhat noisy at the glossy areas, although this render was done with 750 samples... confuse 
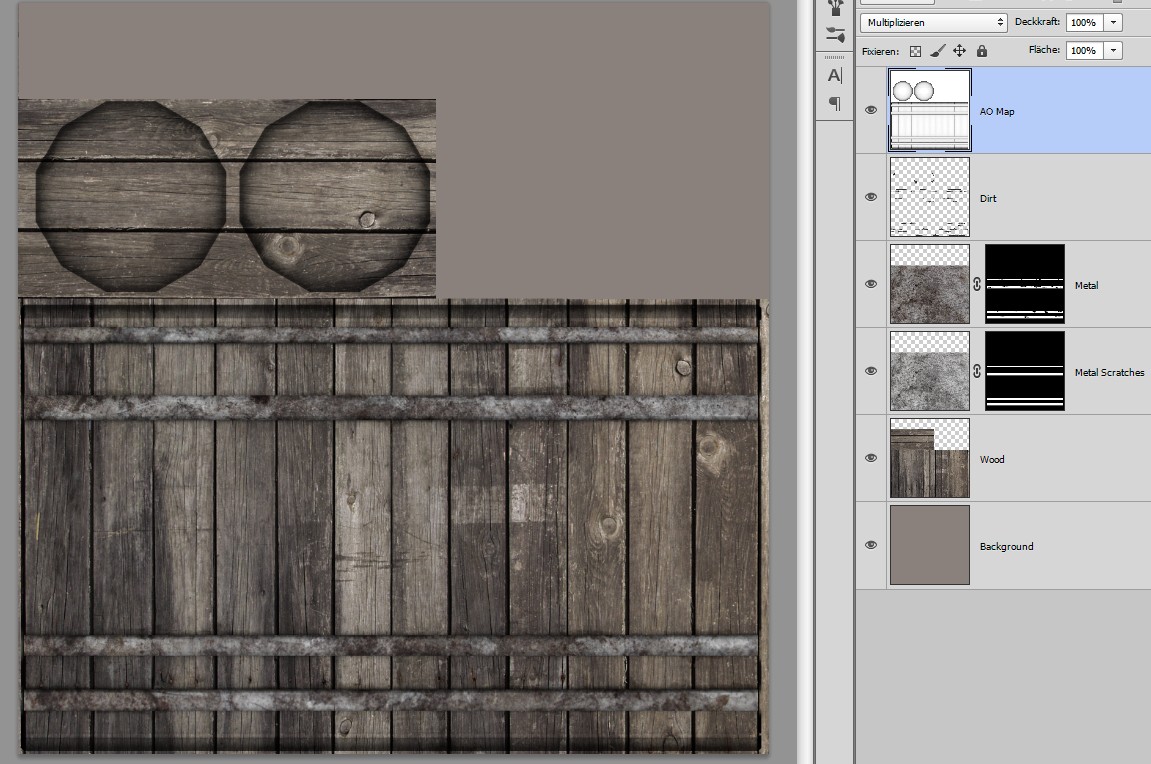
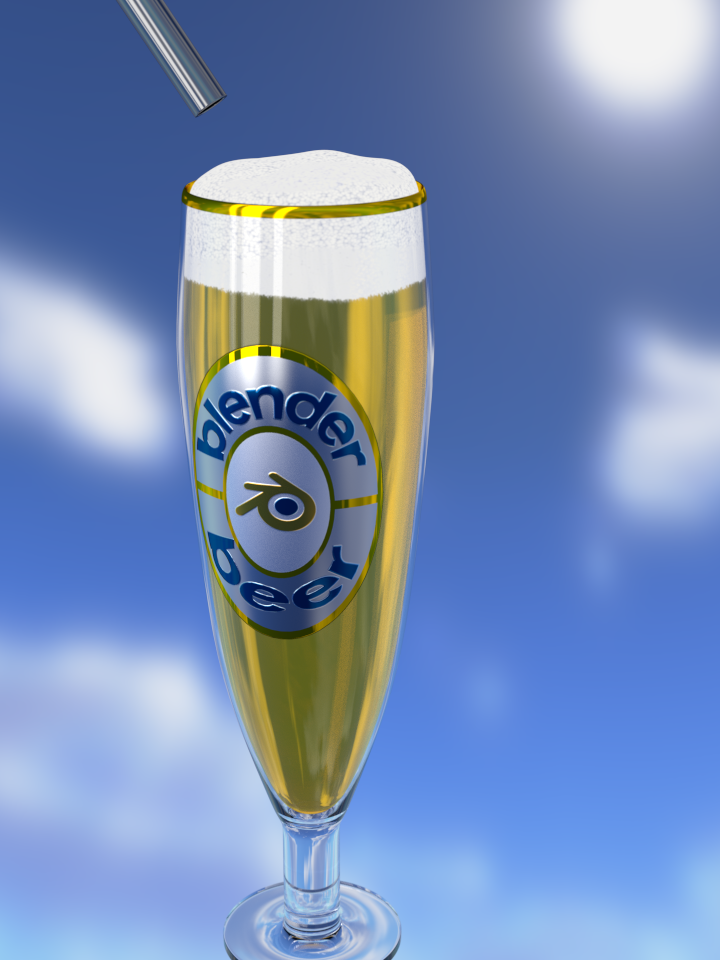
(takes ages without nvidia gfx cards btw)
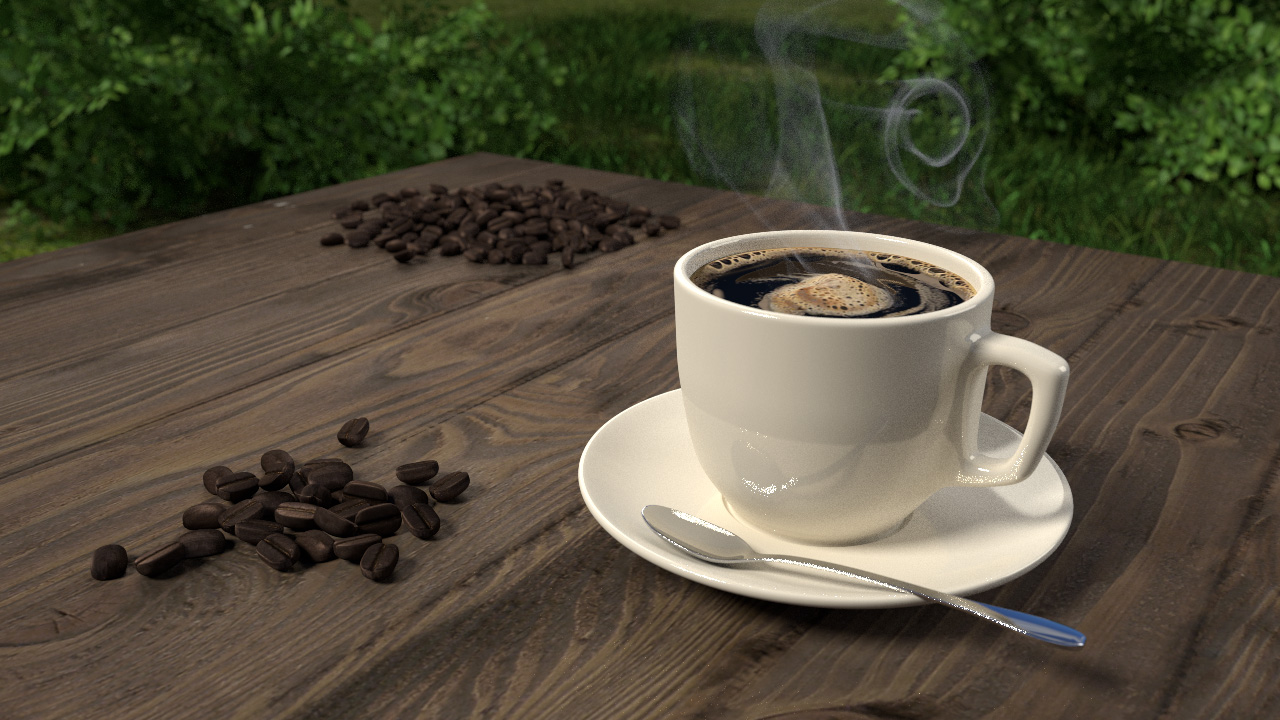
 

render_coffecup_03jep7n.jpg


-- Edited by mAlkAv!An on Friday 21st of June 2013 12:46:15 PM

__________________

Blog

Nichts wäret ewiglich, nur die Natur bleibt bestehen.


Connoisseur of Bourbon!

Status: Offline
Posts: 2912
Date:
Permalink  
 

Very very nice Malk!

__________________

I like playing with stuff!


calculating Pi by hand

Status: Offline
Posts: 768
Date:
Permalink  
 

Thanks
Here's a new try. I was able to eliminate the artifacts by using a different light setup. Unfortunately there is still some noise, even with 2000 samples.


render_coffecup_05opuoh.jpg


-- Edited by mAlkAv!An on Friday 21st of June 2013 09:21:38 PM

__________________

Blog

Nichts wäret ewiglich, nur die Natur bleibt bestehen.


Checkmate mate.

Status: Offline
Posts: 1022
Date:
Permalink  
 

Thats amazing. Props for your skills thusfar.

I wanna use that for DM-Coffeecup!

__________________


My Leveldesign Portfolio
Map Packs for Unreal Tournament 3

Internal Coördination of the UOF4 Low Poly Map Pack


...ǝp¡s ɹǝɥʇo ǝɥʇ uo

Status: Offline
Posts: 4290
Date:
Permalink  
 

wow....now i want a coffee....so reallistic that i can smell it from here

__________________


AMD RYZEN 7 1800x@ 4.0ghz-MSI X370 PRO CARBON-MSI RTX2070SuperGamingX Trio-Corsair Vengeance DDR4 16GB-SAMSUNG 850Evo-LOGITECH G19-MSI DS300 & HX1200i-COOLERMASTER HAF Stacker915R/935/915F-Custom Loop


calculating Pi by hand

Status: Offline
Posts: 768
Date:
Permalink  
 

Try one of these :)

render_beerglass_01mrpwj.png


__________________

Blog

Nichts wäret ewiglich, nur die Natur bleibt bestehen.


...ǝp¡s ɹǝɥʇo ǝɥʇ uo

Status: Offline
Posts: 4290
Date:
Permalink  
 

Rofl...awesome mate...believ it or not, @ work today i asked me why u didnt do it with beer instead of coffee....very nice looking! Prost^^

__________________


AMD RYZEN 7 1800x@ 4.0ghz-MSI X370 PRO CARBON-MSI RTX2070SuperGamingX Trio-Corsair Vengeance DDR4 16GB-SAMSUNG 850Evo-LOGITECH G19-MSI DS300 & HX1200i-COOLERMASTER HAF Stacker915R/935/915F-Custom Loop


calculating Pi by hand

Status: Offline
Posts: 768
Date:
Permalink  
 

Hehe :) Still struggling with how to make the beer foam look realistically - gonna ask for some advices over at blender forums.

Meanwhile here's my first approach on replicating this: http://geizhals.at/p/7997/577997/577997-3.jpg

render_headphone_02d6cli.jpg


__________________

Blog

Nichts wäret ewiglich, nur die Natur bleibt bestehen.


Connoisseur of Bourbon!

Status: Offline
Posts: 2912
Date:
Permalink  
 

Very nice job on ya first effort on replicating that Malk!

__________________

I like playing with stuff!

«First  <  18 9 10 11 12 13  >  Last»  | Page of 13  sorted by
 
Quick Reply

Please log in to post quick replies.


Create your own FREE Forum
Report Abuse
Powered by ActiveBoard